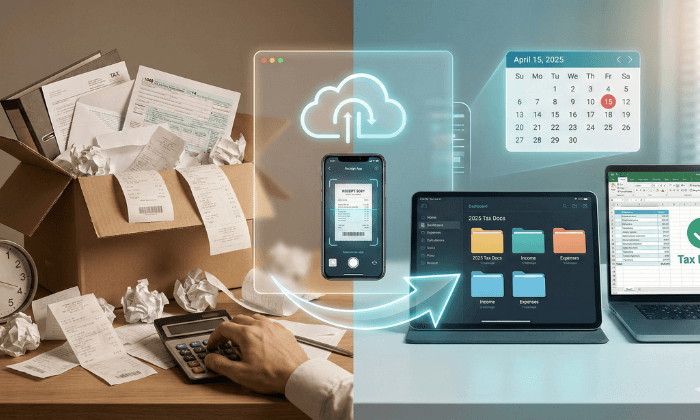
The best way to organize business receipts for taxes is to process each record through the same system.
Capture it when received. Confirm it is readable. Name and categorize it. Match it to your accounting records. Store it for the required period.
Your system must cover two document sources:
- Receipts generated by purchases
- Tax forms, invoices, notices, and statements received by mail
Bringing both sources into one searchable system reduces missing documents and makes it easier to work with your bookkeeper or CPA.
How to Organize Business Receipts in Five Steps
Use this workflow throughout the year:
- Capture each receipt or mailed document.
- Verify the record is complete and readable.
- Apply a consistent filename.
- Categorize and reconcile it with your books.
- Back it up and retain it for the required period.
Do not wait until tax season. A short monthly review is easier than sorting a year of mixed records at once
Decide Which Business Records to Collect
Keep records that support the income, expenses, deductions, credits, assets, and liabilities reported in your books or tax return.
| Document source | Common examples | Capture method | Storage location |
|---|---|---|---|
| Postal mail | Tax forms, IRS notices, invoices, bank correspondence | Envelope image and requested content scan | Tax Forms or Notices folder |
| In-person purchases | Meals, supplies, fuel, equipment | Receipt-scanning app or phone camera | Expense category folder |
| Online invoices, subscriptions, travel confirmations | Save or export as PDF | Expense category folder | |
| Accounting platforms | Invoices, payment confirmations, reports | Export from the platform | Income or Accounting folder |
| Permanent records | EIN letter, formation documents, operating agreements | Scan and retain as required | Permanent Business Records |
A transaction may require more than one supporting document. A card statement can show that you paid a vendor. The receipt shows what you purchased. Your notes can establish the business purpose.
Step 1: Capture Records When You Receive Them
Capture Paper Receipts
Photograph or scan a paper receipt before it fades or gets lost.
Confirm that the image shows:
- Vendor or payee
- Transaction date
- Amount paid
- Items or services purchased
- Taxes and tips when relevant
- Payment method
- Business purpose when it is not clear from the receipt
For a business meal, record the attendees and business purpose while you still remember them.
Capture Mailed Business Documents
Postal mail requires a separate intake process.
If you receive mail at an office or home address, assign one person to review and scan tax-related mail.
Remote businesses can use a virtual mailbox to view images of incoming envelopes and request scans of the contents online.
An envelope image is not the same as a scan of the enclosed document.
Request an Open & Scan when you need the contents.
Review government correspondence promptly and record any response deadline in your business calendar.
Capture Email and Online Receipts
Create a dedicated email label for receipts and invoices.
Save important records as PDFs instead of relying on an email account as the only copy. Online accounts can close, subscriptions can end, and older records may become unavailable.
Step 2: Verify and Name Every File
Before filing a digital record, confirm that it is complete and readable.
Check every page. Make sure numbers, dates, and item descriptions are visible. Rescan any document with missing edges, shadows, or blurred text.
Use one filename format across the business:
YYYY-MM-DD_Vendor_Amount_Category
Example:
2026-10-15_OfficeDepot_84.50_OfficeSupplies.pdf
For tax forms or government correspondence, use the document type:
2026-01-31_ClientName_1099-NEC.pdf
2026-08-12_IRS_Notice_CP2000.pdf
Consistent filenames improve sorting and make records easier to retrieve by date, vendor, amount, or document type.
Step 3: Use a Folder Structure That Matches Your Books
A three-folder system can work for a small business. However, placing every expense in one folder makes reconciliation harder as transaction volume increases.
Use a structure that reflects your bookkeeping categories:
- 2026 Tax Records
- Income
- Tax Forms
- Government Notices
- Expenses
- Advertising
- Insurance
- Meals
- Office Supplies
- Professional Services
- Software
- Travel
- Utilities
- Assets and Equipment
- Payroll
- Filed Returns
- Permanent Business Records
- EIN Letter
- Formation Documents
- Operating Agreements
- Licenses
- Insurance Policies
Ask your accountant which categories align with your chart of accounts. Using the same categories in both systems reduces reclassification work.
Keep personal and business transactions separate. A dedicated business bank account and payment card make this process easier.
Step 4: Reconcile Receipts Each Month
A receipt folder is not a complete bookkeeping system.
Reconcile your documents against your bank, card, invoicing, and accounting records every month.
Use this process:
- Compare each transaction with its receipt or invoice.
- Confirm the amount, date, vendor, and category.
- Add the business purpose when needed.
- Identify missing or duplicate records.
- Confirm that income documents match recorded payments.
- Review outstanding government notices or requests.
- Mark the month as complete.
A statement alone may not show what you purchased or why the expense relates to your business. Keep the source document when it provides information missing from the statement.
Step 5: Back Up and Share Records Securely
Choose one primary storage system. Avoid splitting records across personal email, several drives, phones, and employee accounts.
Protect access with:
- Strong account passwords
- Multifactor authentication
- Role-based permissions
- Regular exports or backups
- A process for removing former employees
- A documented recovery method
Agree with your accountant on file formats, folder names, categories, and delivery dates. Give the accountant access only to the records needed for the engagement.
Do not assume an integration transferred every file. Review exports and permissions before you begin tax preparation.
Does the IRS Accept Digital Receipts?
The IRS can accept electronic business records when the storage system meets applicable record-keeping requirements.
A readable image alone does not establish compliance. Under IRS Revenue Procedure 97-22, an electronic storage system must support accurate transfer, indexing, preservation, retrieval, readable reproduction, quality controls, and an audit trail between source documents and the business’s records.
Before discarding an original, confirm that:
- Every page transferred correctly
- The electronic copy remains readable
- You can locate and reproduce it
- The system protects records from unauthorized changes or deletion
- The record connects to the related accounting entry
- No state agency, insurer, lender, regulator, or contract requires the original
Keep the paper when the scan is incomplete, the document has legal significance, or a professional adviser recommends retaining it.
How Long Should You Keep Business Receipts?
The retention period depends on what the document supports.
| Record situation | General federal retention period |
|---|---|
| Most income-tax records | Three years after filing |
| Claim for a credit or refund after filing | Three years after filing or two years after payment, whichever is later |
| Worthless securities or bad-debt deduction | Seven years |
| More than 25% of gross income omitted | Six years |
| Employment tax records | At least four years after the tax became due or was paid, whichever is later |
| No return filed or fraudulent return | Indefinitely |
| Property and asset records | Through the limitation period for the year of disposal |
The IRS record-retention guidance explains these federal periods.
State tax agencies and other organizations may require longer retention. Check the rules that apply to your location, business structure, contracts, and industry.
A Two-Lane Recordkeeping Example
Consider two records received on the same day.
Mailed 1099
- The virtual mailbox displays the incoming envelope.
- You request a content scan.
- You confirm the payer name, tax year, and amount.
- You save it as 2026-01-31_ClientName_1099-NEC.pdf.
- You place it in the Tax Forms folder.
- You compare it with the income recorded in your books.
- You share the completed folder with your accountant.
Client Meal Receipt
- You photograph the receipt after payment.
- You confirm the date, amount, and restaurant.
- You add the attendees and business purpose.
- You save it using the standard filename.
- You place it in the Meals folder.
- You match it to the card transaction.
- Your accountant determines the tax treatment.
Both records end in the same system even though they enter through different channels.
Business Receipt Organization Checklist
Before considering a month complete, confirm that:
- You’ve captured every receipt and invoice.
- Each scan is readable and complete.
- Filenames follow one format.
- Records use the correct bookkeeping categories.
- Business purposes have been documented.
- Receipts match bank and card transactions.
- Mailed tax forms and notices have been reviewed.
- Missing records have been requested.
- Files have been backed up.
- Accountant access has been tested.
Build a System Before Tax Season
Start with the next document you receive.
Capture it. Verify it. Name it. Categorize it. Match it to your books.
If mailed documents stay outside your digital workflow, learn how a PostScan Mail virtual mailbox lets you view incoming mail and request scans of the contents online.
This guide covers recordkeeping principles. Your CPA or tax adviser should confirm the requirements that apply to your return, state, and industry.